

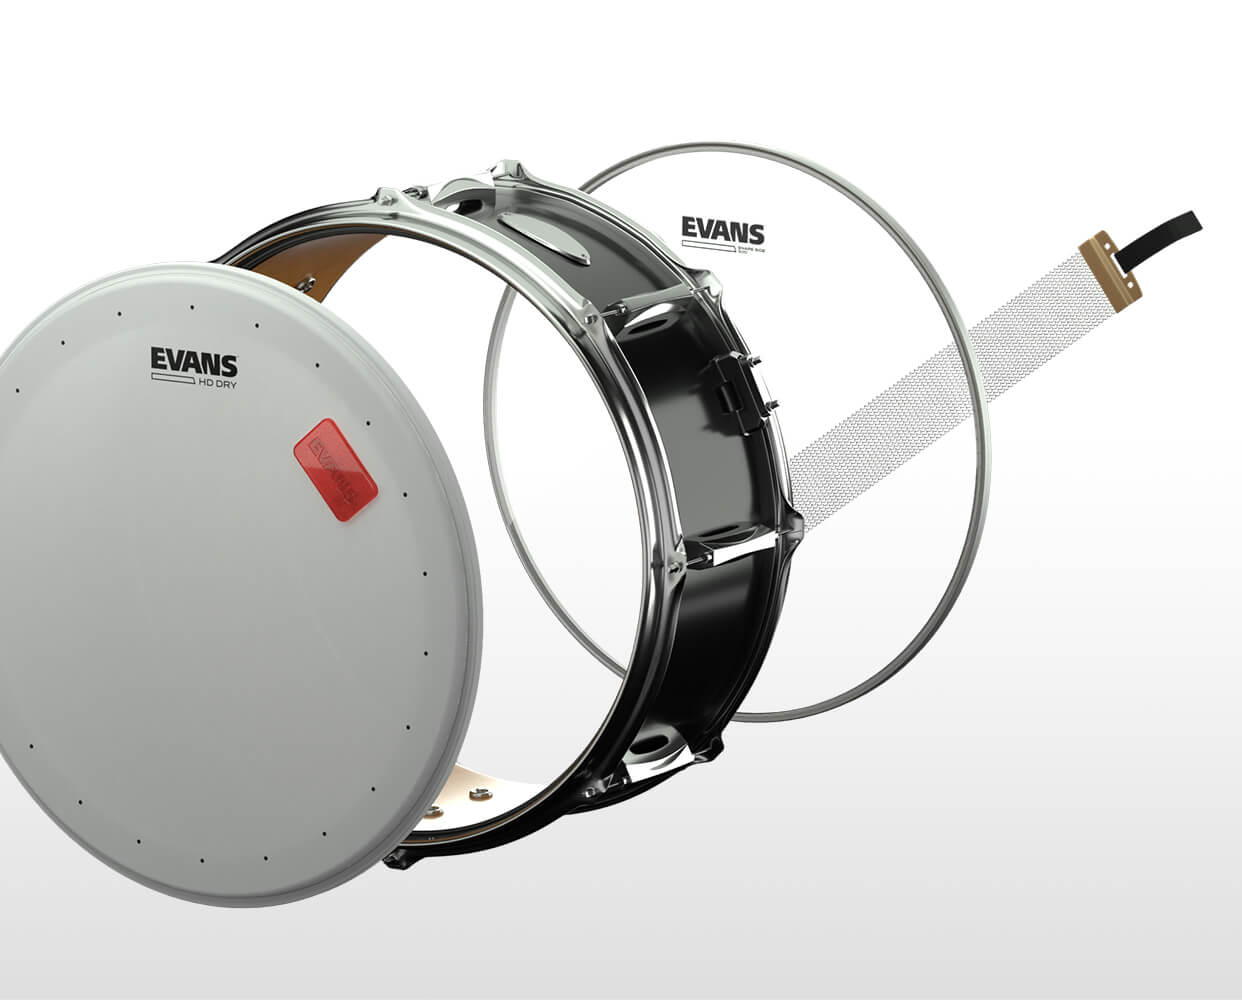
HD DRY
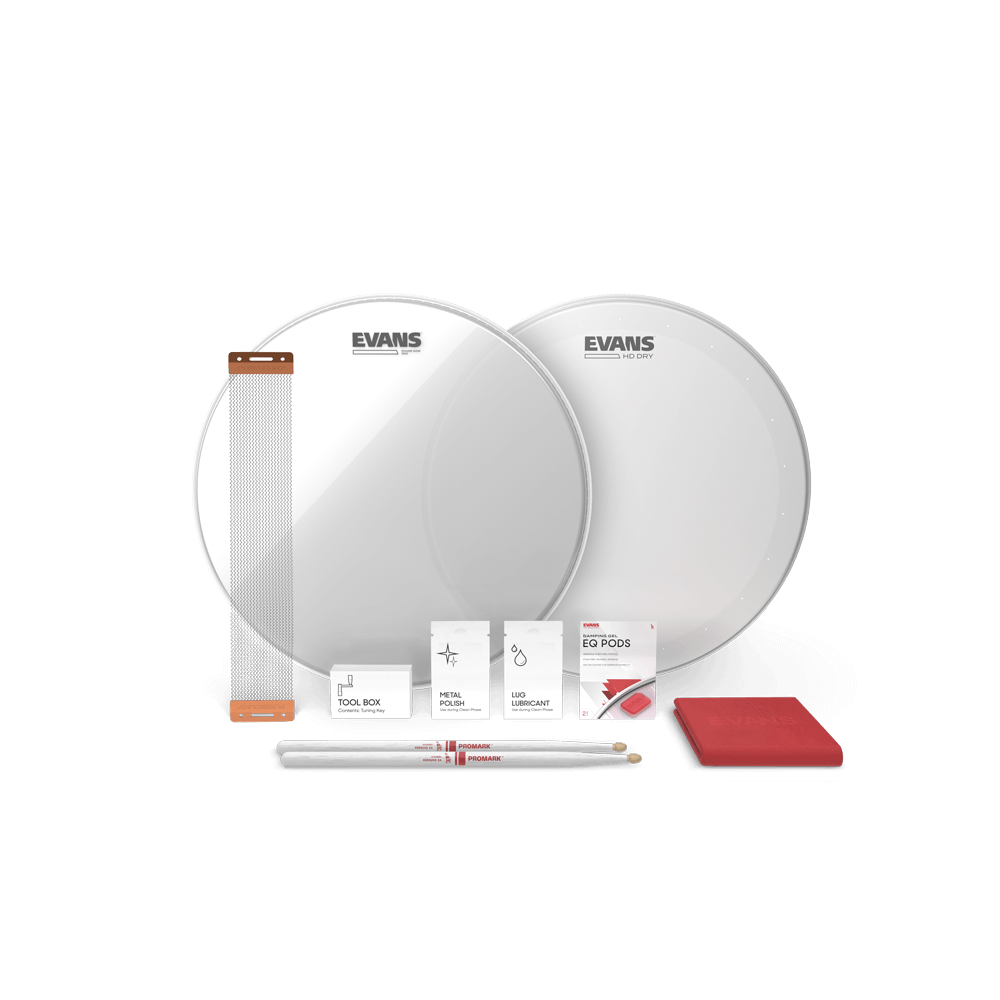
13” Snare Drum Tune Up Kit ESTUK-13HDD-1
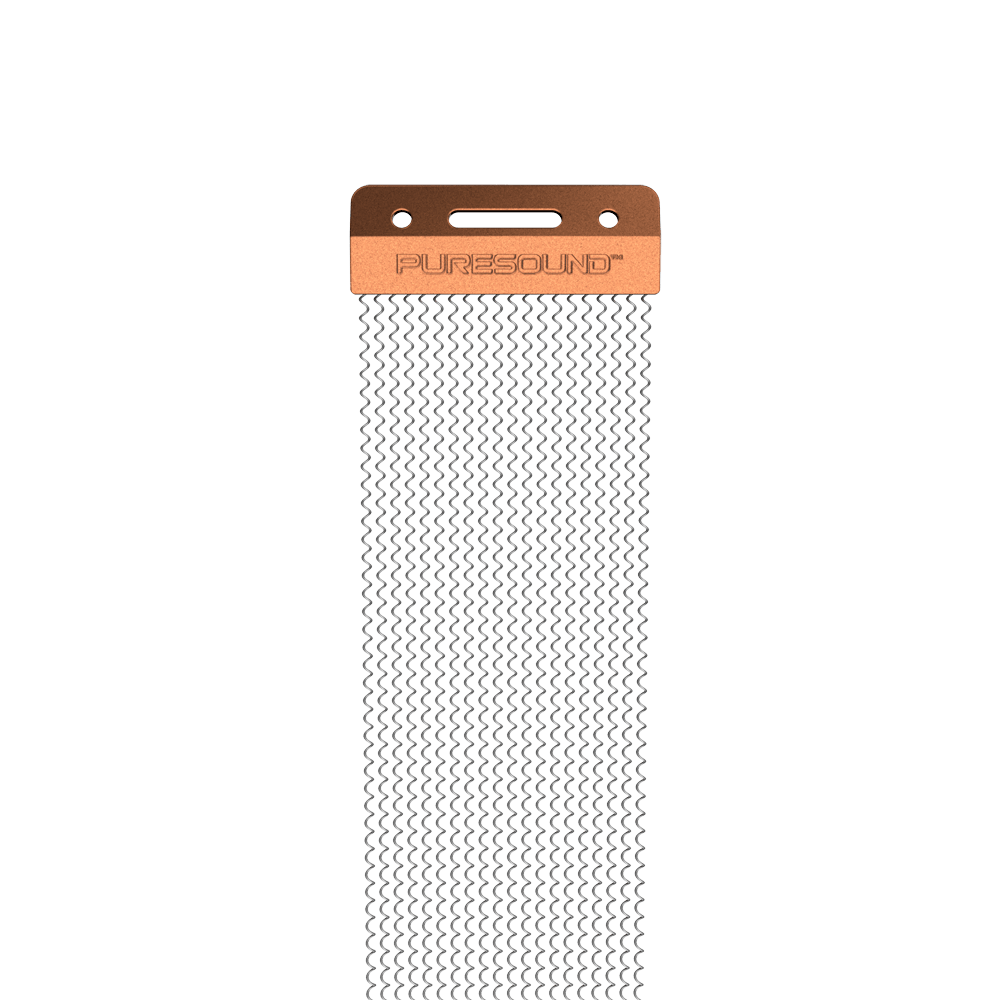
If you want the best performance out of your snare, routine tune-ups are essential. With this kit, EVANS gives you the tools, materials, and instructions to modify, adjust, and holistically maintain your most essential piece of kit. Eliminate excessive overtones, and experience controlled sustain with HD Dry, alongside the complementary Puresound Blasters Series 20 Strand snare wire and a Snareside 300. With utility, variety, and versatility all in one box, the EVANS Snare Tune-Up Kit gives you everything you’ll need but the drum.

your selection is currently unavailable
$79.99
Or
12,150 PTS
Code Value:
1,350 Points
Additional Details
Product Features
Product Specs
String Tension Chart
Additional Resources
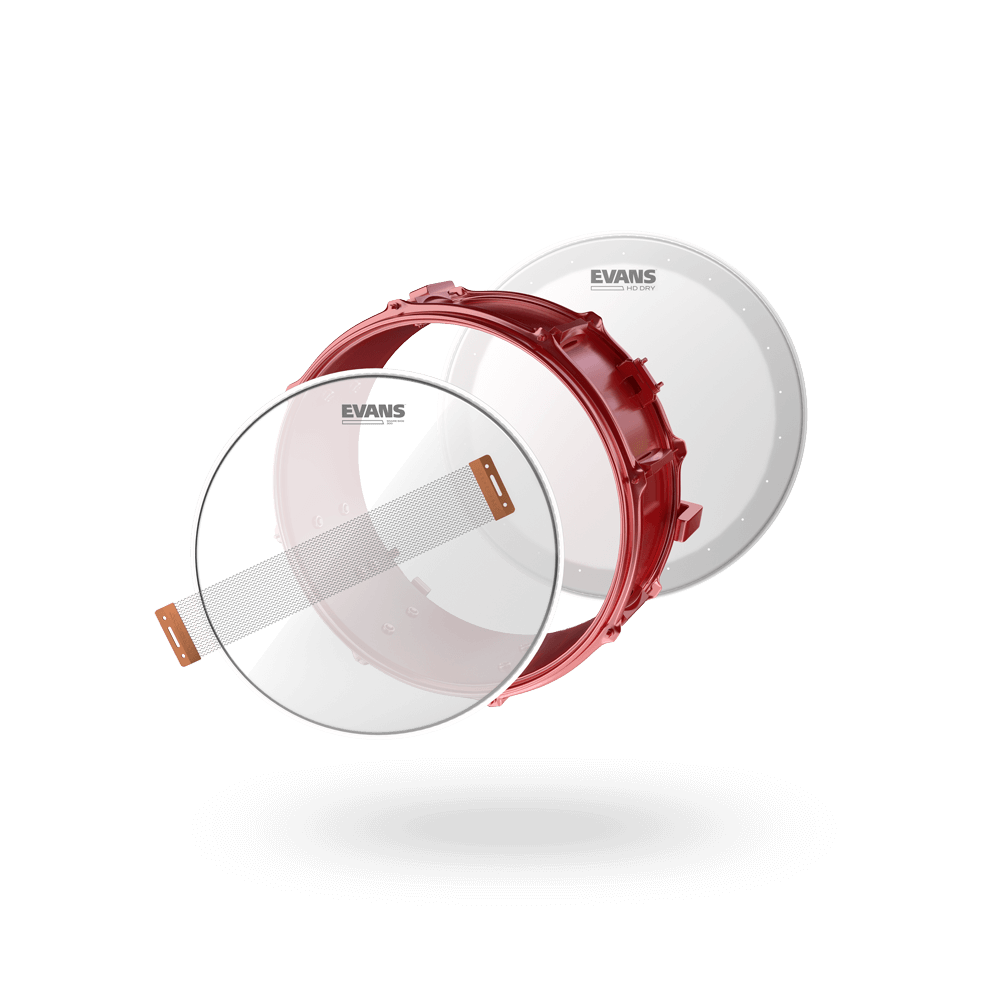
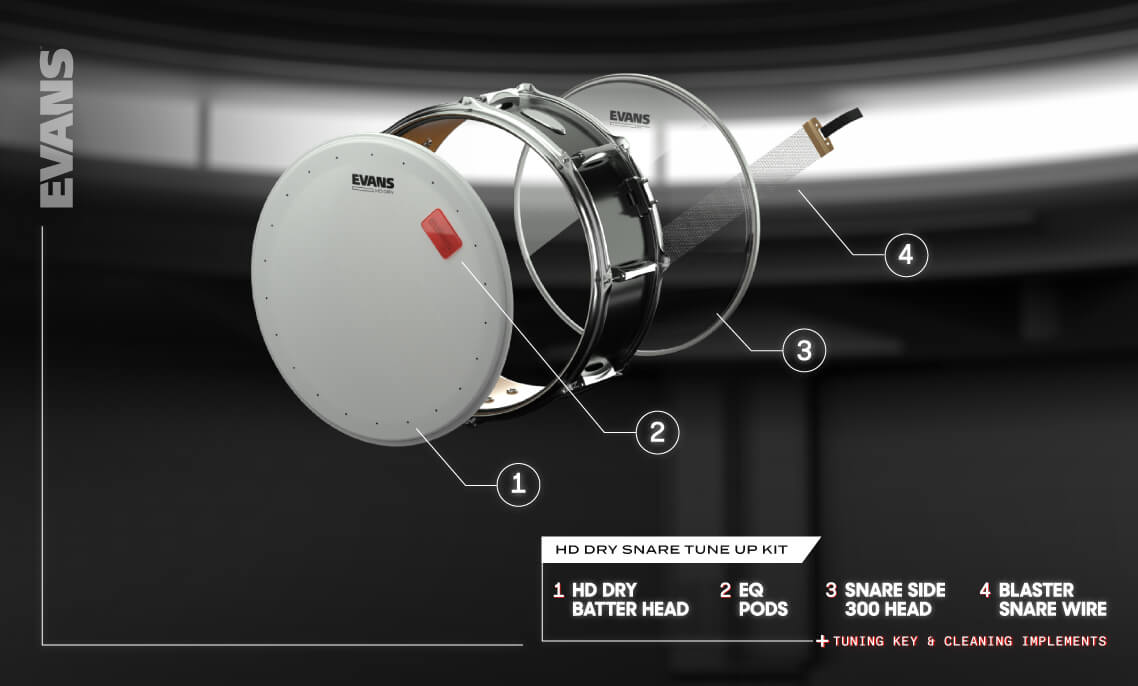
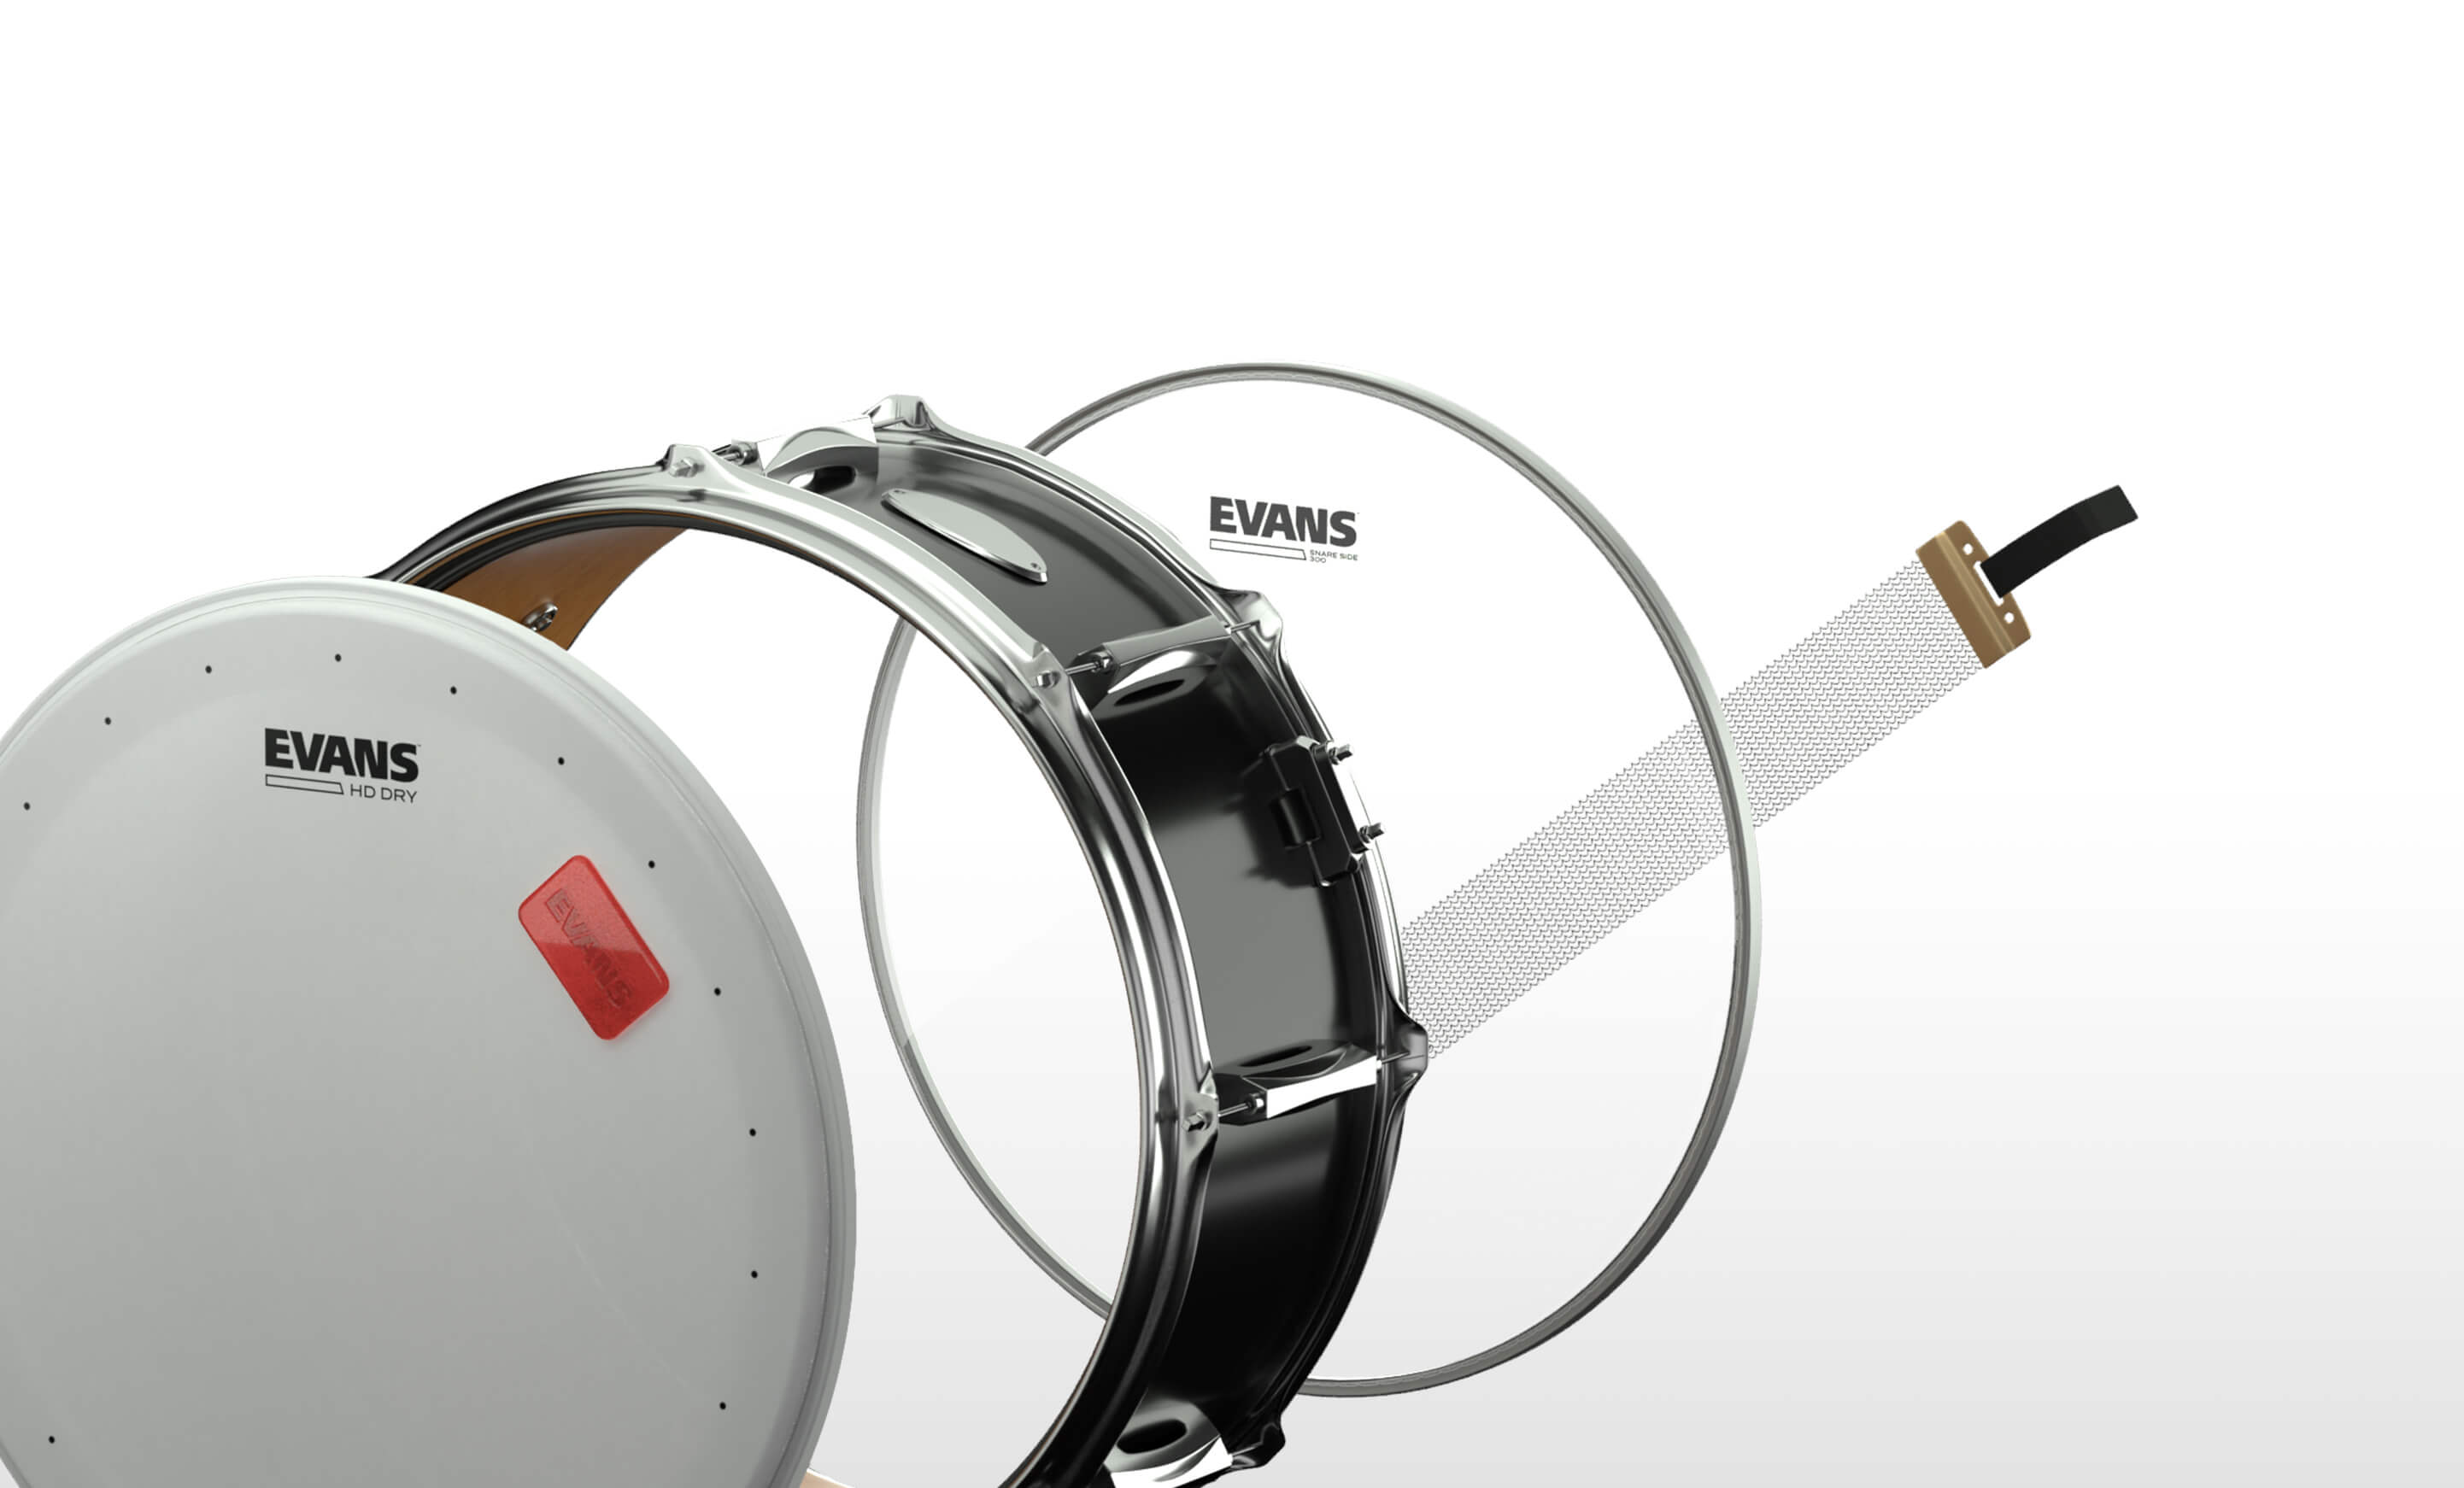
HD DRY SNARE TUNE UP KIT
Get your snare sounding better than ever with the uniquely subdued overtones and controlled sustain of HD Dry drumheads. When accompanied by the tried-and-true Snare Side 300, Puresound Blaster Series Snare Wire, and all the tune-up accessories you could need, these focused heads renew the sound of your favorite snare and bring it to its full percussive potential.


EVERYTHING BUT THE DRUM
TIME FOR A HARDWARE UPDATE
Great snare tone doesn’t happen by accident. It happens when the drum and its swappable hardware come together to create something that’s more than the sum of its parts.
LEVEL IT OUT TO LAY IT DOWN.
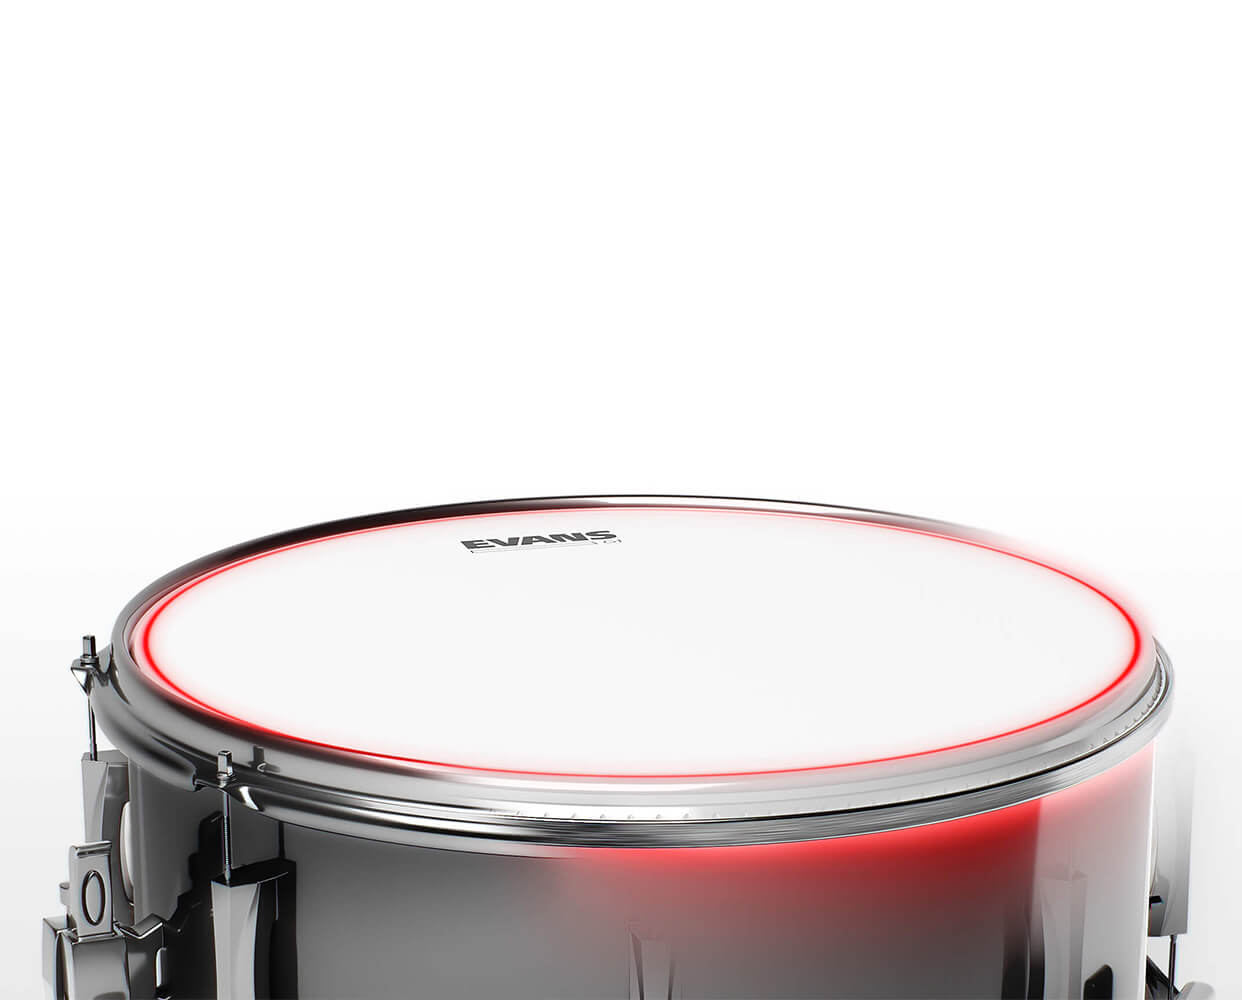
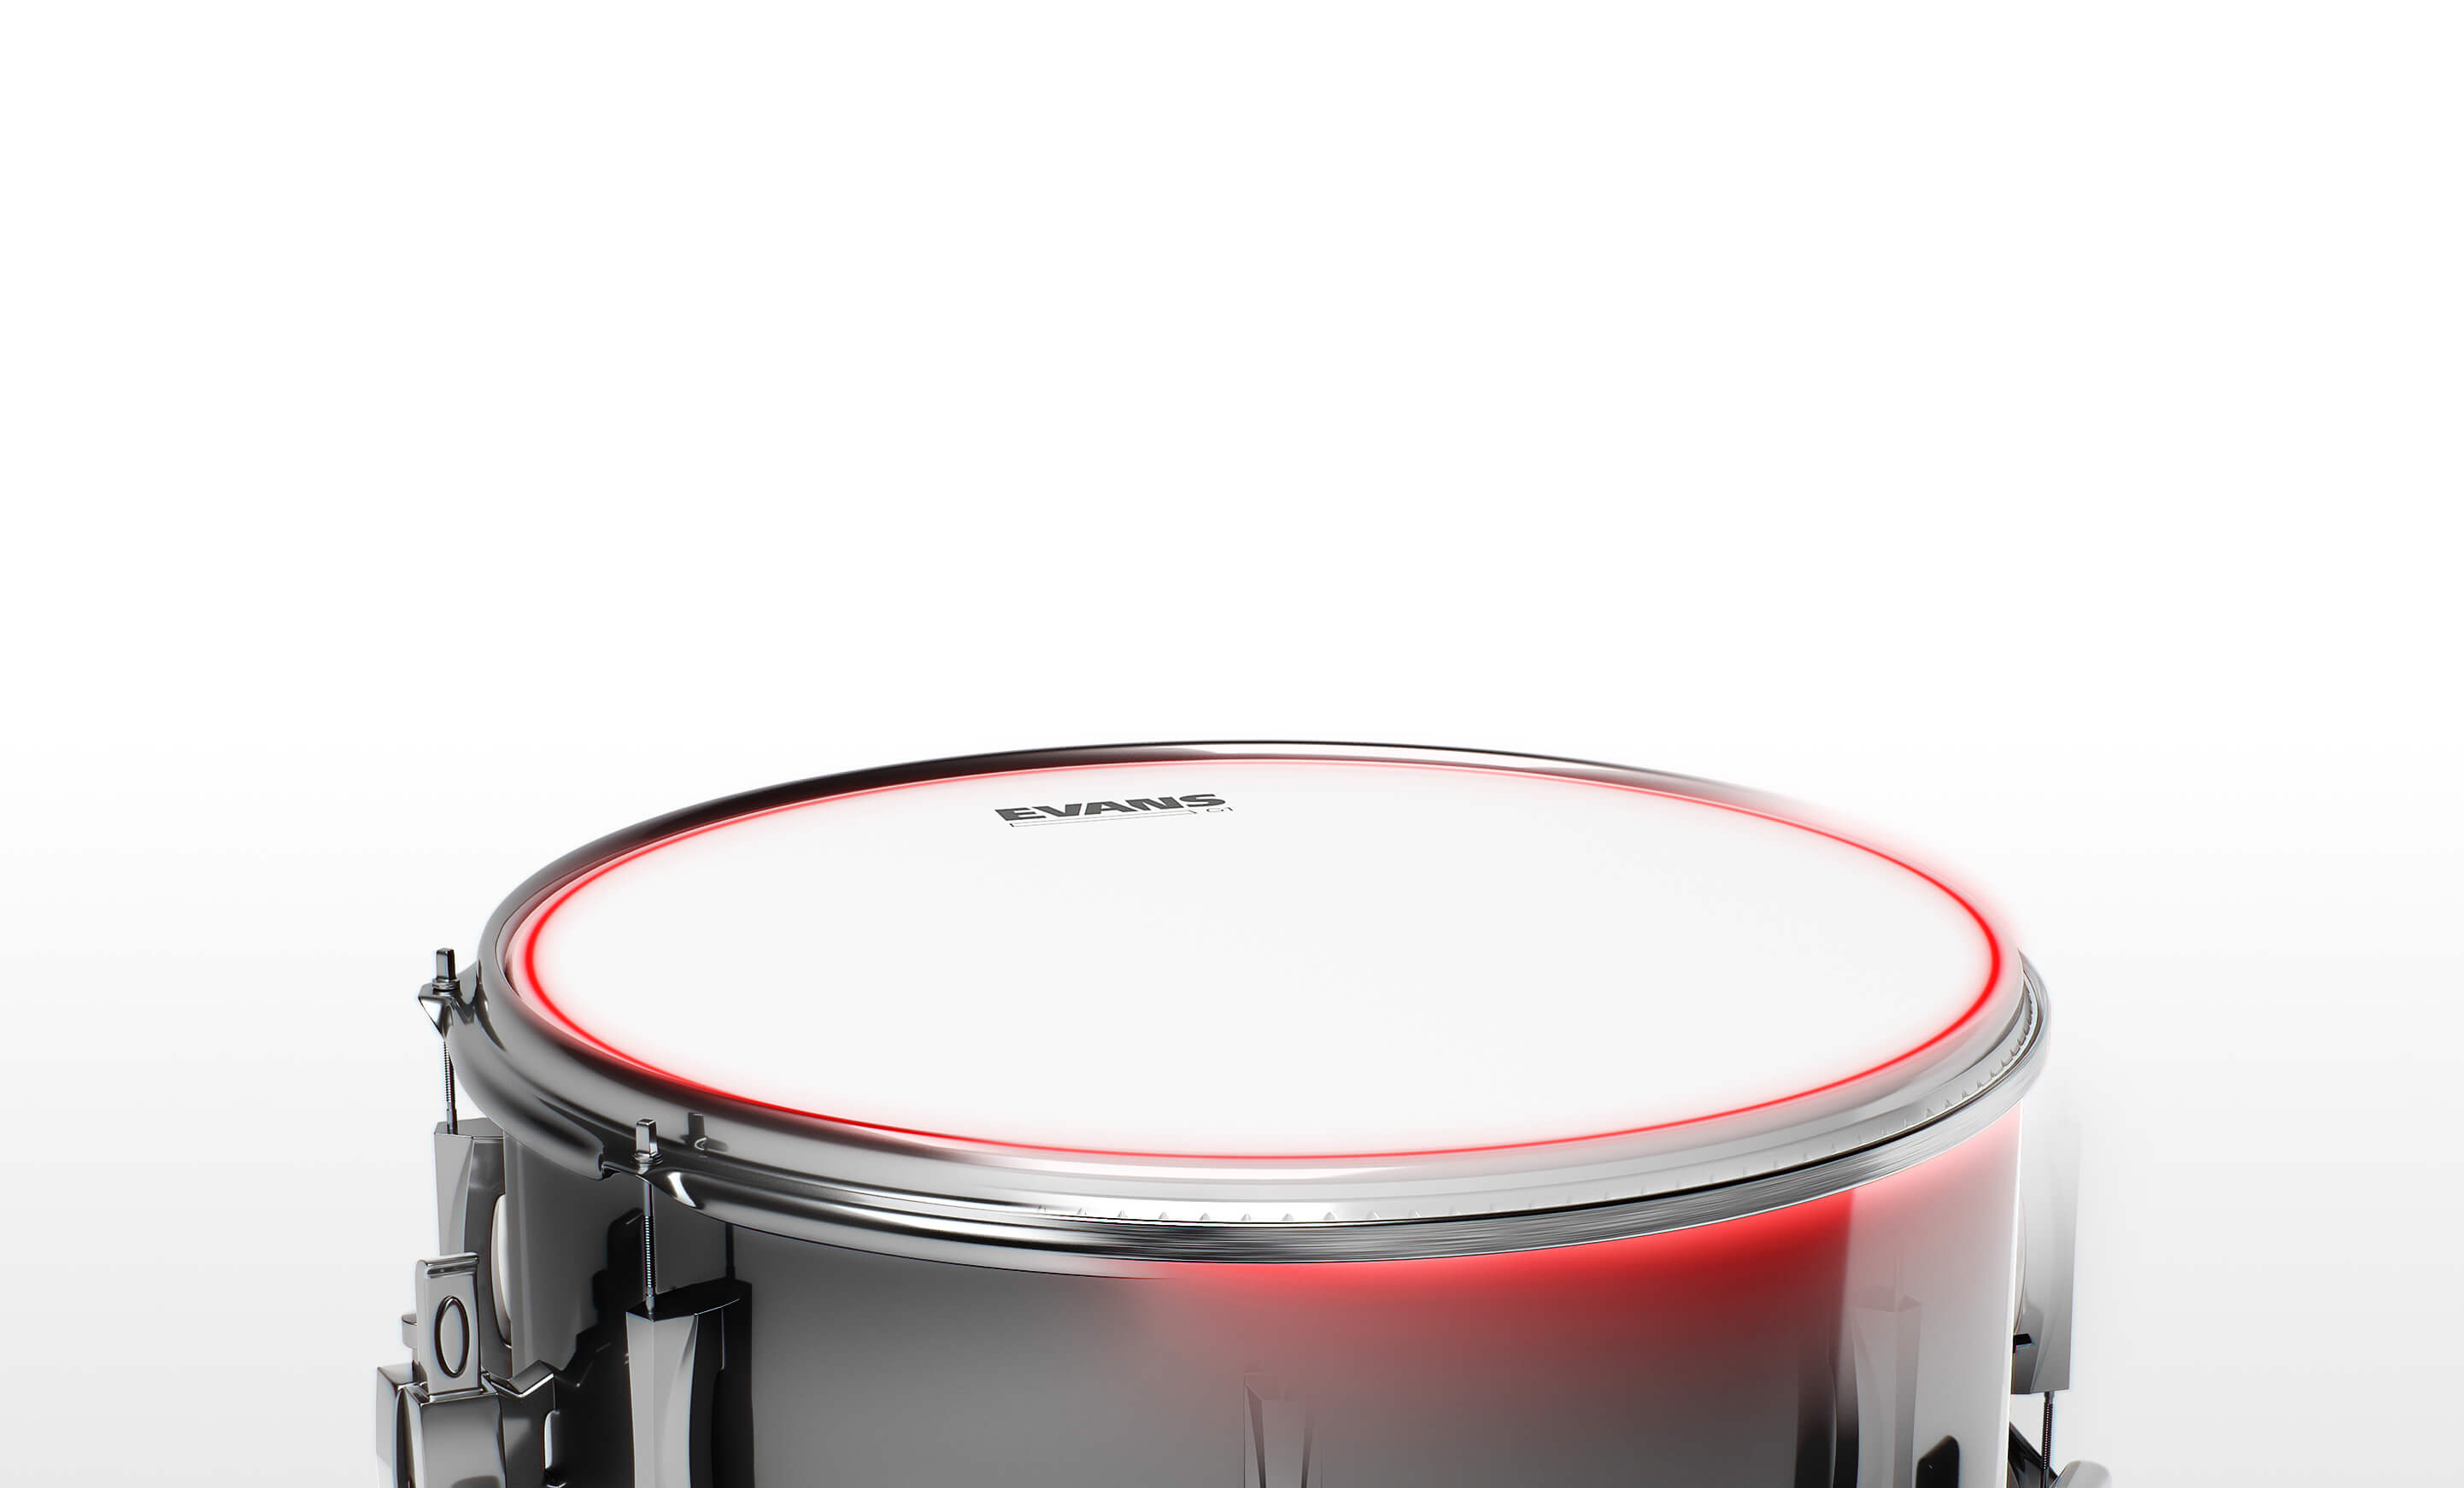
LEVEL 360 TECHNOLOGY
Level 360 Technology extends the level playing surface of the drumhead 360 degrees around the drum. The vertically enhanced collar design guarantees even contact with the edge of the drum shell, creating a perfectly level fit.
EVERYTHING BUT THE DRUM
TIME FOR A HARDWARE UPDATE
Great snare tone doesn’t happen by accident. It happens when the drum and its swappable hardware come together to create something that’s more than the sum of its parts.
LEVEL IT OUT TO LAY IT DOWN.
LEVEL 360 TECHNOLOGY
Level 360 Technology extends the level playing surface of the drumhead 360 degrees around the drum. The vertically enhanced collar design guarantees even contact with the edge of the drum shell, creating a perfectly level fit.
HOW-TO INSTALL
Upgrading your snare hardware with the Snare Tune Up Kit is a critical step toward
perfecting your snare tone. Follow the steps below to ensure a smooth, successful installation.
UNINSTALL
Before the upgrade can commence, old or worn hardware elements must first be removed. Locate a flat work surface, assemble the necessary tools (drum key & screwdriver), and follow the steps to uninstall.
1
Disengage snares and remove existing snare wire. (Drum Tuning Key/Screwdriver)
2
Carefully loosen and remove snare side tension rods in a cross pattern. (Drum Tuning Key)
3
Remove snare side hoop and head. Set tension rods aside.
4
Carefully loosen and remove batter side tension rods in a cross pattern.
5
Remove batter side hoop and head. Set Tension rods aside.
CLEAN
With the drum disassembled, use this opportunity to clean the shell with the included
Polish Cloth. Use the included Metal Polish to revive hoops and metal hardware. You may
also wish to apply the included Lug Lubricant to ensure a smooth installation and tuning process.
INSTALL
With the disassembled drum now clean and lubricated, the installation process may begin. Follow these steps to ensure that the installation of all new hardware elements goes smoothly, leaving the snare ready to be tuned and dialed in to your preferred tone.
6
Place new batter head and batter side hoop on drum.
7
Install lubricated batter side tension rods to finger-tightness.
8
Place new snare side head and snare side hoop on drum, taking care to align bottom hoop with snare bed.
9
Install lubricated snare side tension rods to finger tightness.
10
Attach snare wire to snare hardware. (Drum Tuning Key/Philips Head Screwdriver)
TUNE
With the snare reassembled and fitted with its new Tune Up Kit hardware, the final step
is to tune it up. Each player’s preferences for tuning are different, but if you’d like some
tips on tuning, installation, and achieving your ideal tone, check out the video below.

